XP-el arranges a PCB (Printed Circuit Board) course annually, which usually takes place in the first quarter of the year. The course is free for XP-el members but costs 50SEK for students/staff at LTU.
During the course you have the opportunity to build a PCB from scratch. XP-el provides two ready-made project suggestions; a 'blink-blink' (easy) and an 'AVR programmer' (hard). It is of course perfectly fine to decide on your own soldering project, and get help with it during the course.
When you have decided what soldering project you'd like to do, you'll start by creating the PCB digitally. You will learn how to connect components, route traces and place them on the PCB.
The course consists of two evening sessions where experienced members of XP-el are on site to assist you with your project. It is strongly recommended that you download the Eagle CAD software and work on the design at home; if you suspect that you will not have enough time to finish the design in the two evening sessions. XP-el recommends that you bring your project on a USB stick so that you can easily transport your project from XP-el's computers and your home comouter.
When you're done with your design, the fun begins! You will get to etch your PCB and then start soldering! For etching, you need to schedule a time with the head of XP-el. There will be members to help you with the manufacturing (see pictures below) during the course.
The PCB course is a collaboration between Computer Science, Electrical and Space Engineering (SRT) and XP-el, where SRT provides the locale and materials, and XP-el provides course instructors and reading instructions. If you finish the PCB course and you found it to be interesting, the university courses Electronics and Electronics II are strongly recommended.
Upcoming courses
[eme_events category=7]
Instructions KiCAD – LED dimmer
Soon ™
Instructions Eagle – LED dimmer
Here is a .zip file that contains everything you need to get started with programming the LED dimmer in Eagle: LEDDimmer
You also have the instructions here: Instructions
Instructions - OLD
Here are links to the instructions which XP-el uses in the PCB if you want to sneak start at home:
Tutorial
Installation of Eagle
How to create a schematic in Eagle
How to create the DC-plug
How to create your own layout in Eagle
Etching at home
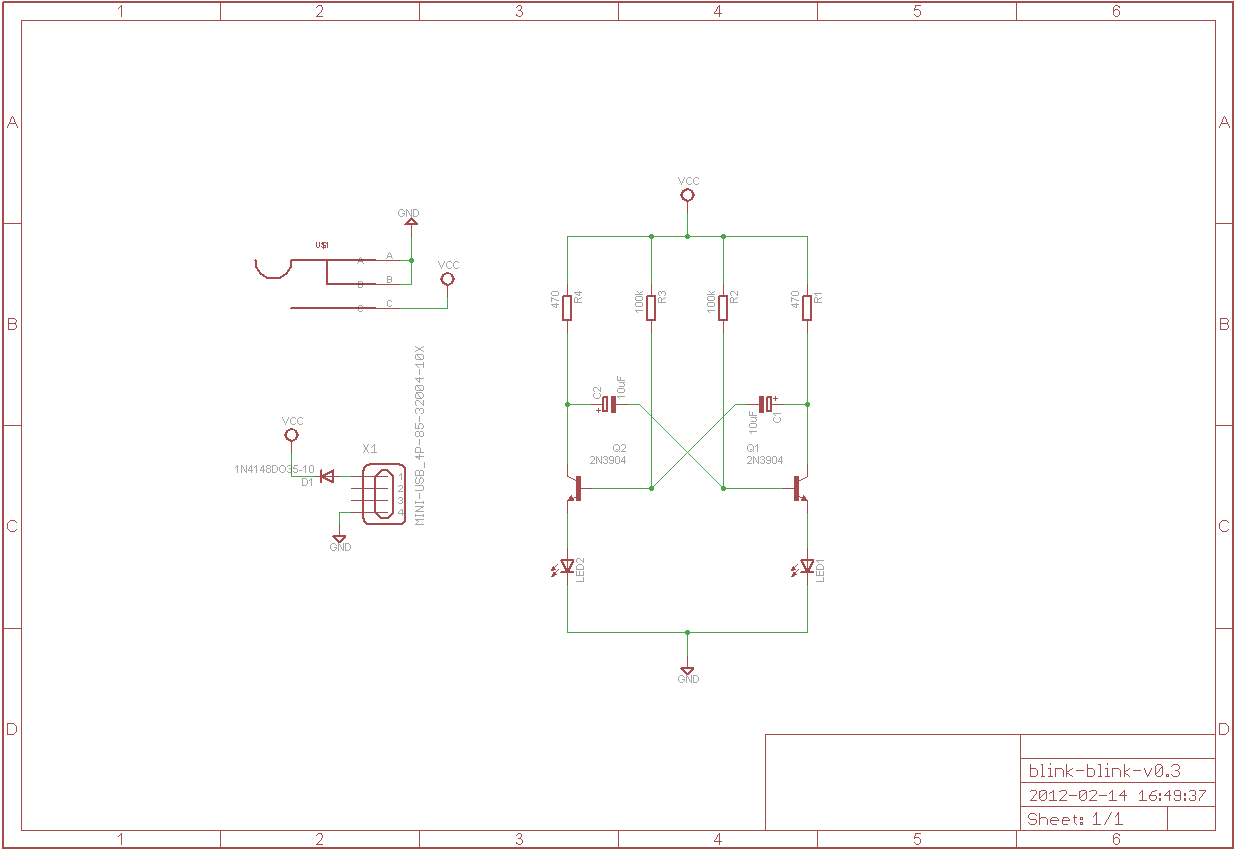
Blink-Blink schematic
If you would like to try your hands on the AVR programmer, we strongly recommend that you also read the following documents: